Cabin #5: Peeling the logs, so many logs
/Logs, logs and more logs. We love building with them because they are the “local material” most readily available to us. A little background on the steps that came before this entry…
We cut the logs for our cabin in the winter from a nice stand of White Spruce about 1/2 mile above our home and drug them down to the building site using the dogs and snowmachine (see our logging blog entry).
As soon as they warmed up that spring, we used shovels and draw knives to “bark” the logs, basically a quick way of removing the initial bark so that the logs could dry and be safe from insects (see barking blog entry).
Once this was done we had to keep the logs off the ground so they wouldn’t rot. We made a “rack” by placing aspen logs perpendicular to the log raft (see image below).
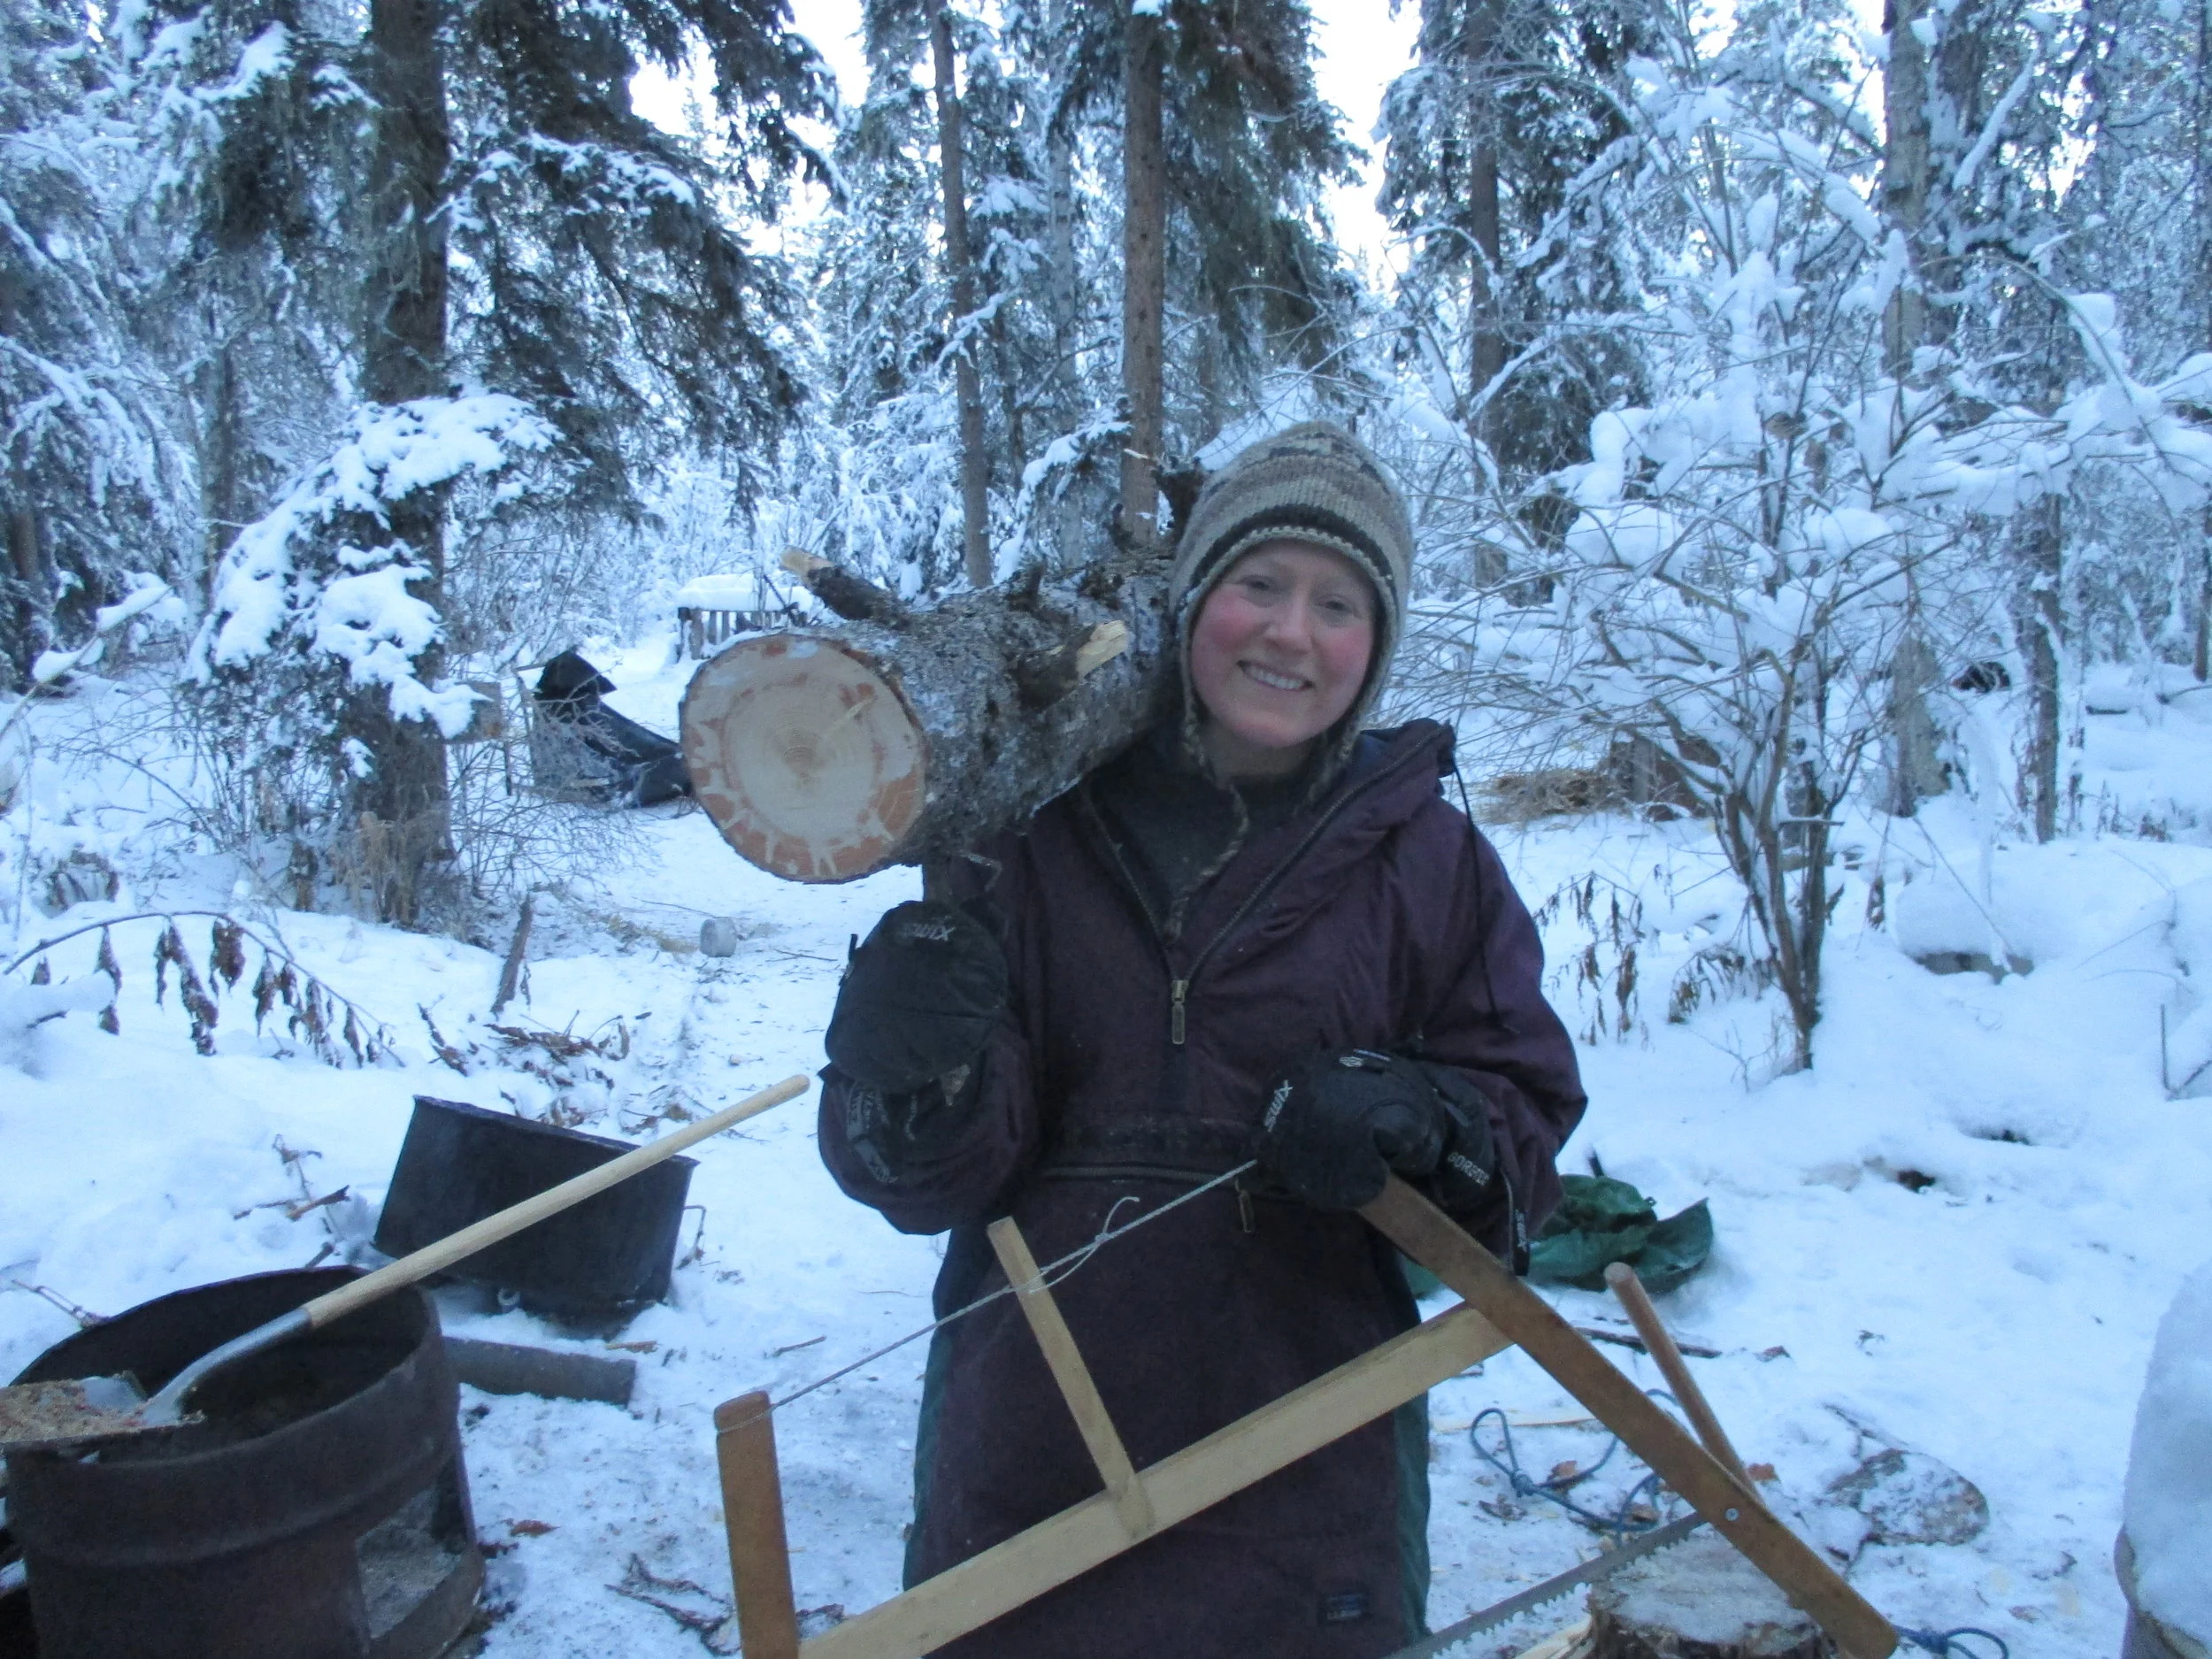
For the next two years, the logs dried in the sun and we occasionally rolled them to make sure they were drying evenly and not rotting where they touched the log rack. Drying the logs made them significantly lighter and easier to lift onto the cabin. The image below is the “victory moment”- the last peel on the last log. Behind me is the log rack with peeled 25-foot wall logs on it. The logs I am sitting on is one of the 32-footers- the ridge pole, perlins, and plate logs.

David has a few log cabin builds under his belt, but this was my (Jenna’s) first one. The first obstacle that I had to overcome as a newbie was figuring out how the heck to move the 25-32 foot long beastly logs. Peeling logs requires moving them from the log pile to the log rack and rolling them around. Brute strength? Not a chance. Moving logs requires some basic knowledge of physics and a lot of mechanical advantage. We used a variety of poles to pry and roll, rather than lift the logs. Luckily we had some really good tools. The top four were:
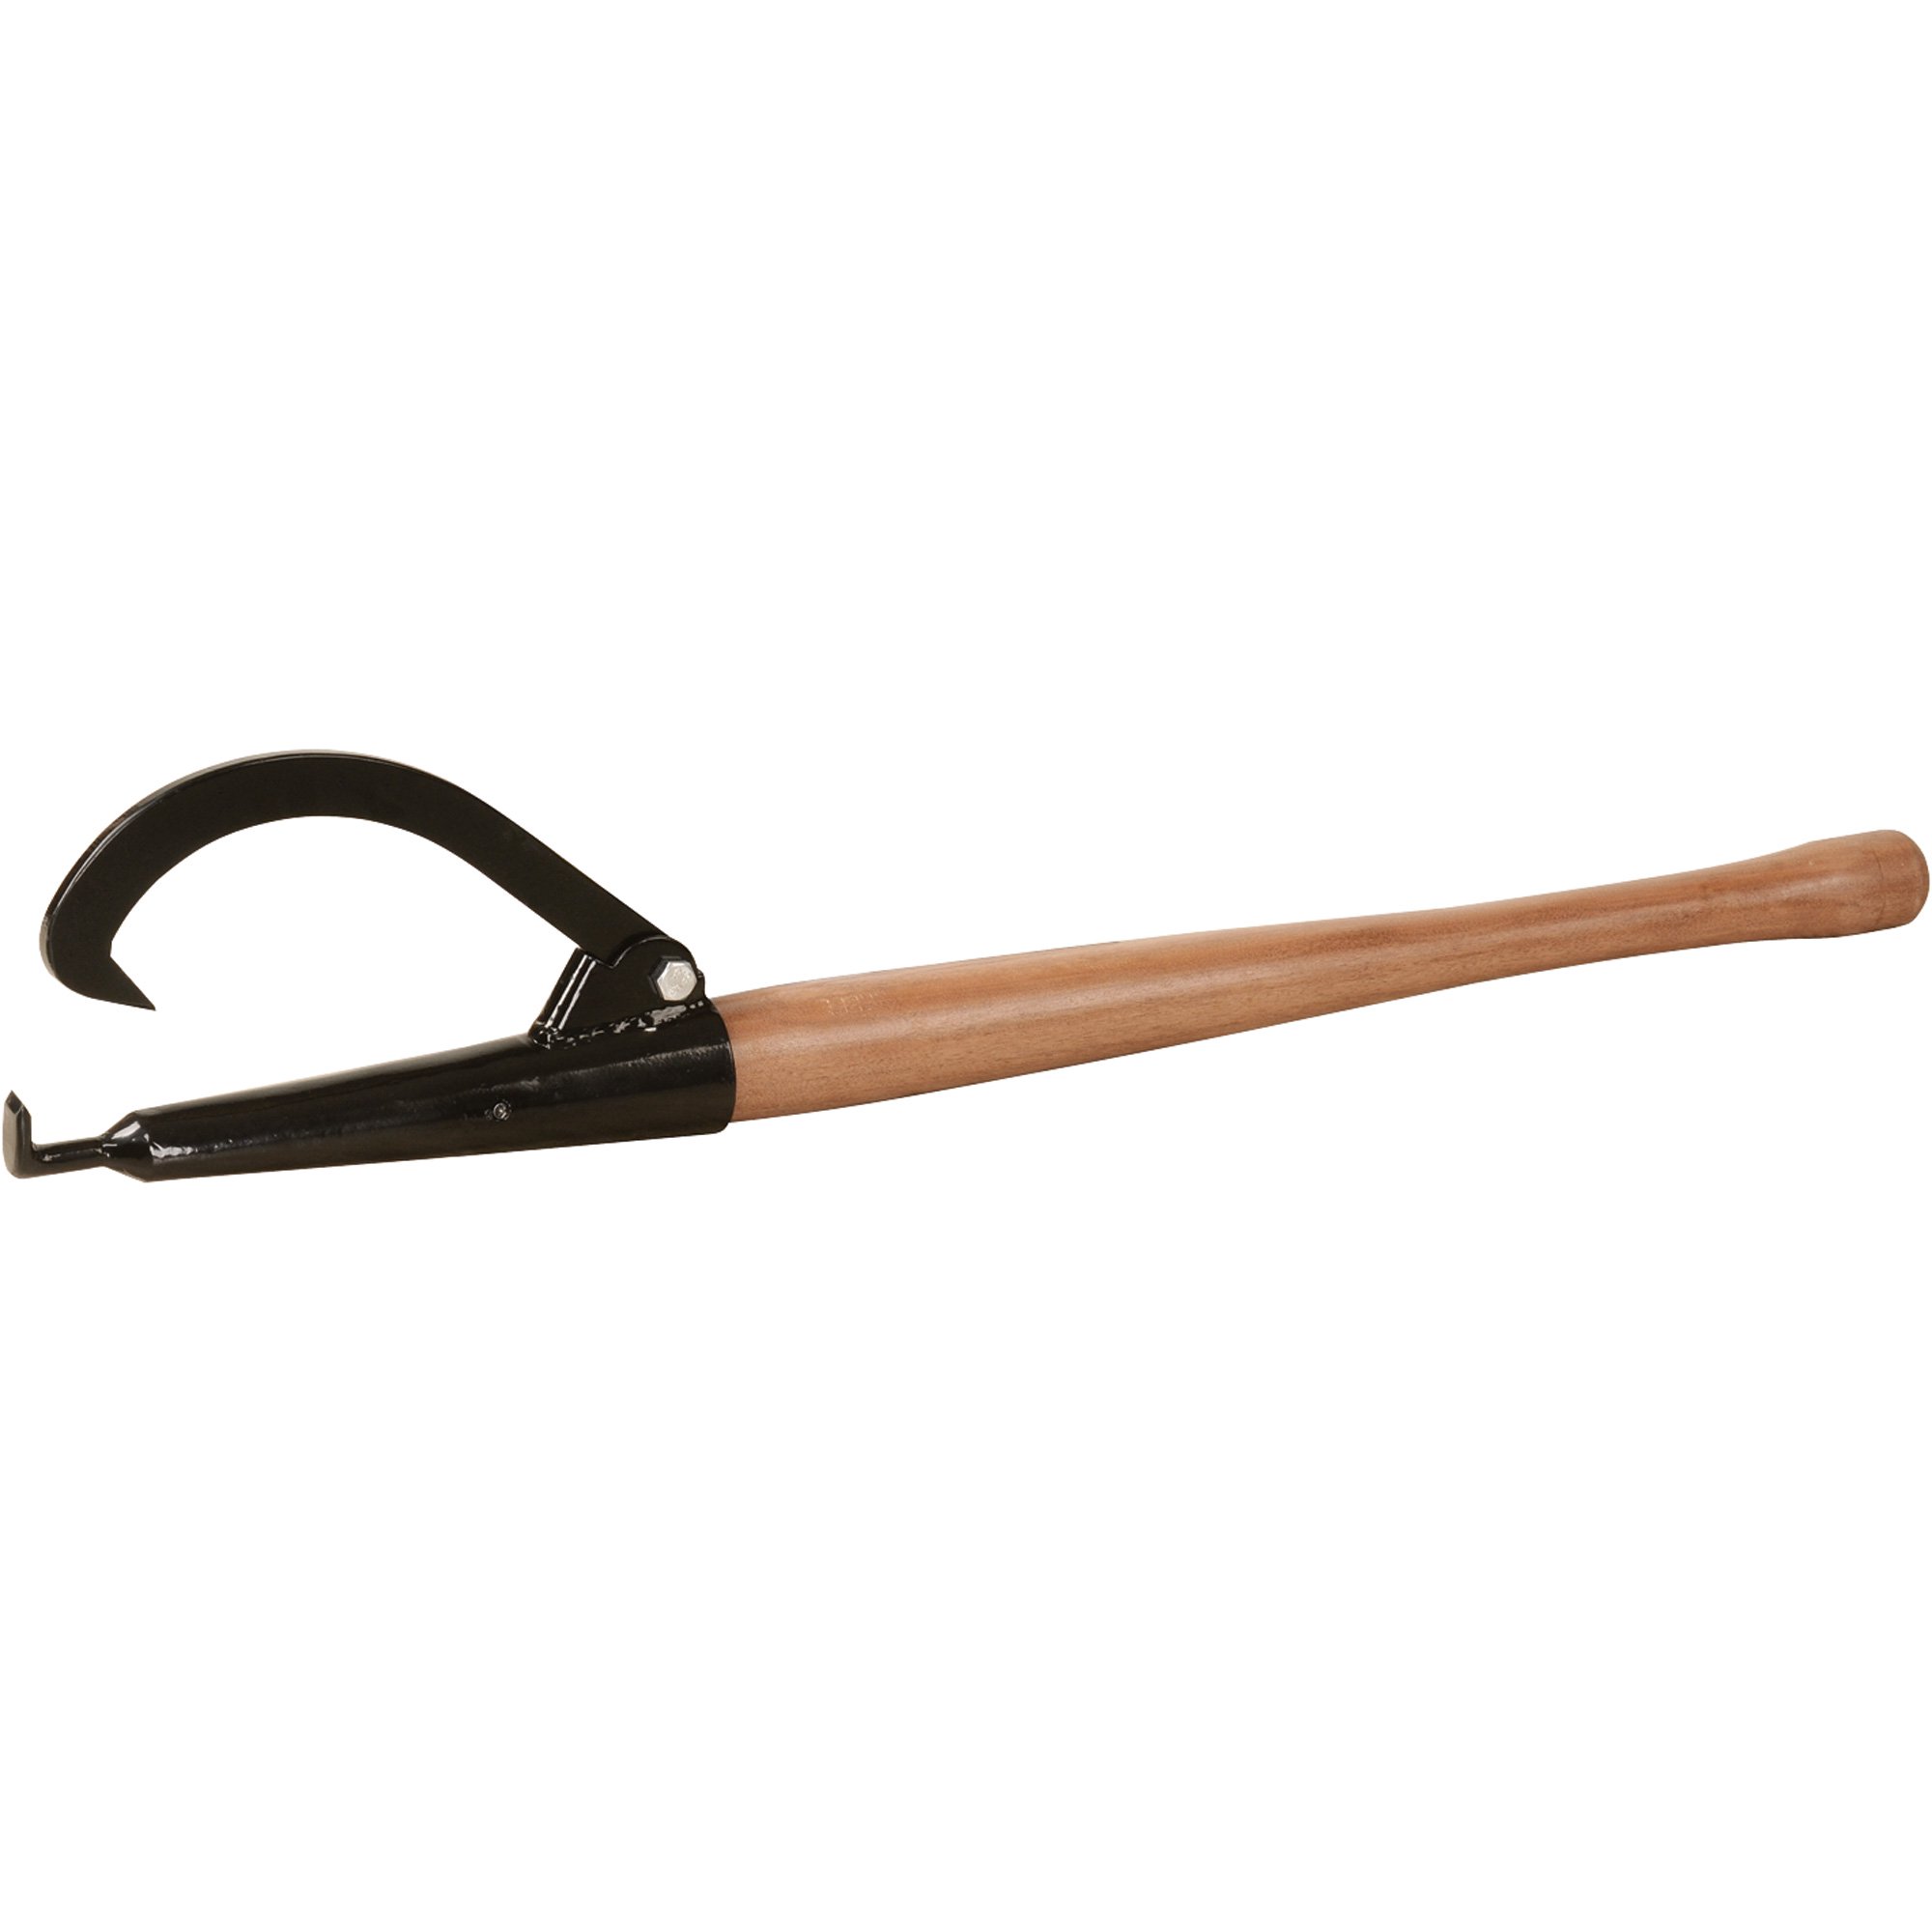
Cant hook (image below on the left)- We used the hook part of this to easily roll the logs and the pole to occasionally pry. Usually for heavy duty prying we would use a pry bar because they were more disposable. The tip of the hook easily sank into the soft wood and made it easy to roll.
Peavey (image below on the right)- We got this tool from an antique store a couple years into the build and it proved to be worth its weight. It is similar to the cant hook except the tip is a sharp so you can easily stand it up in the ground and avoid losing it. Many stressful minutes were spent trying to locate the cant hook when we put it down on the job.

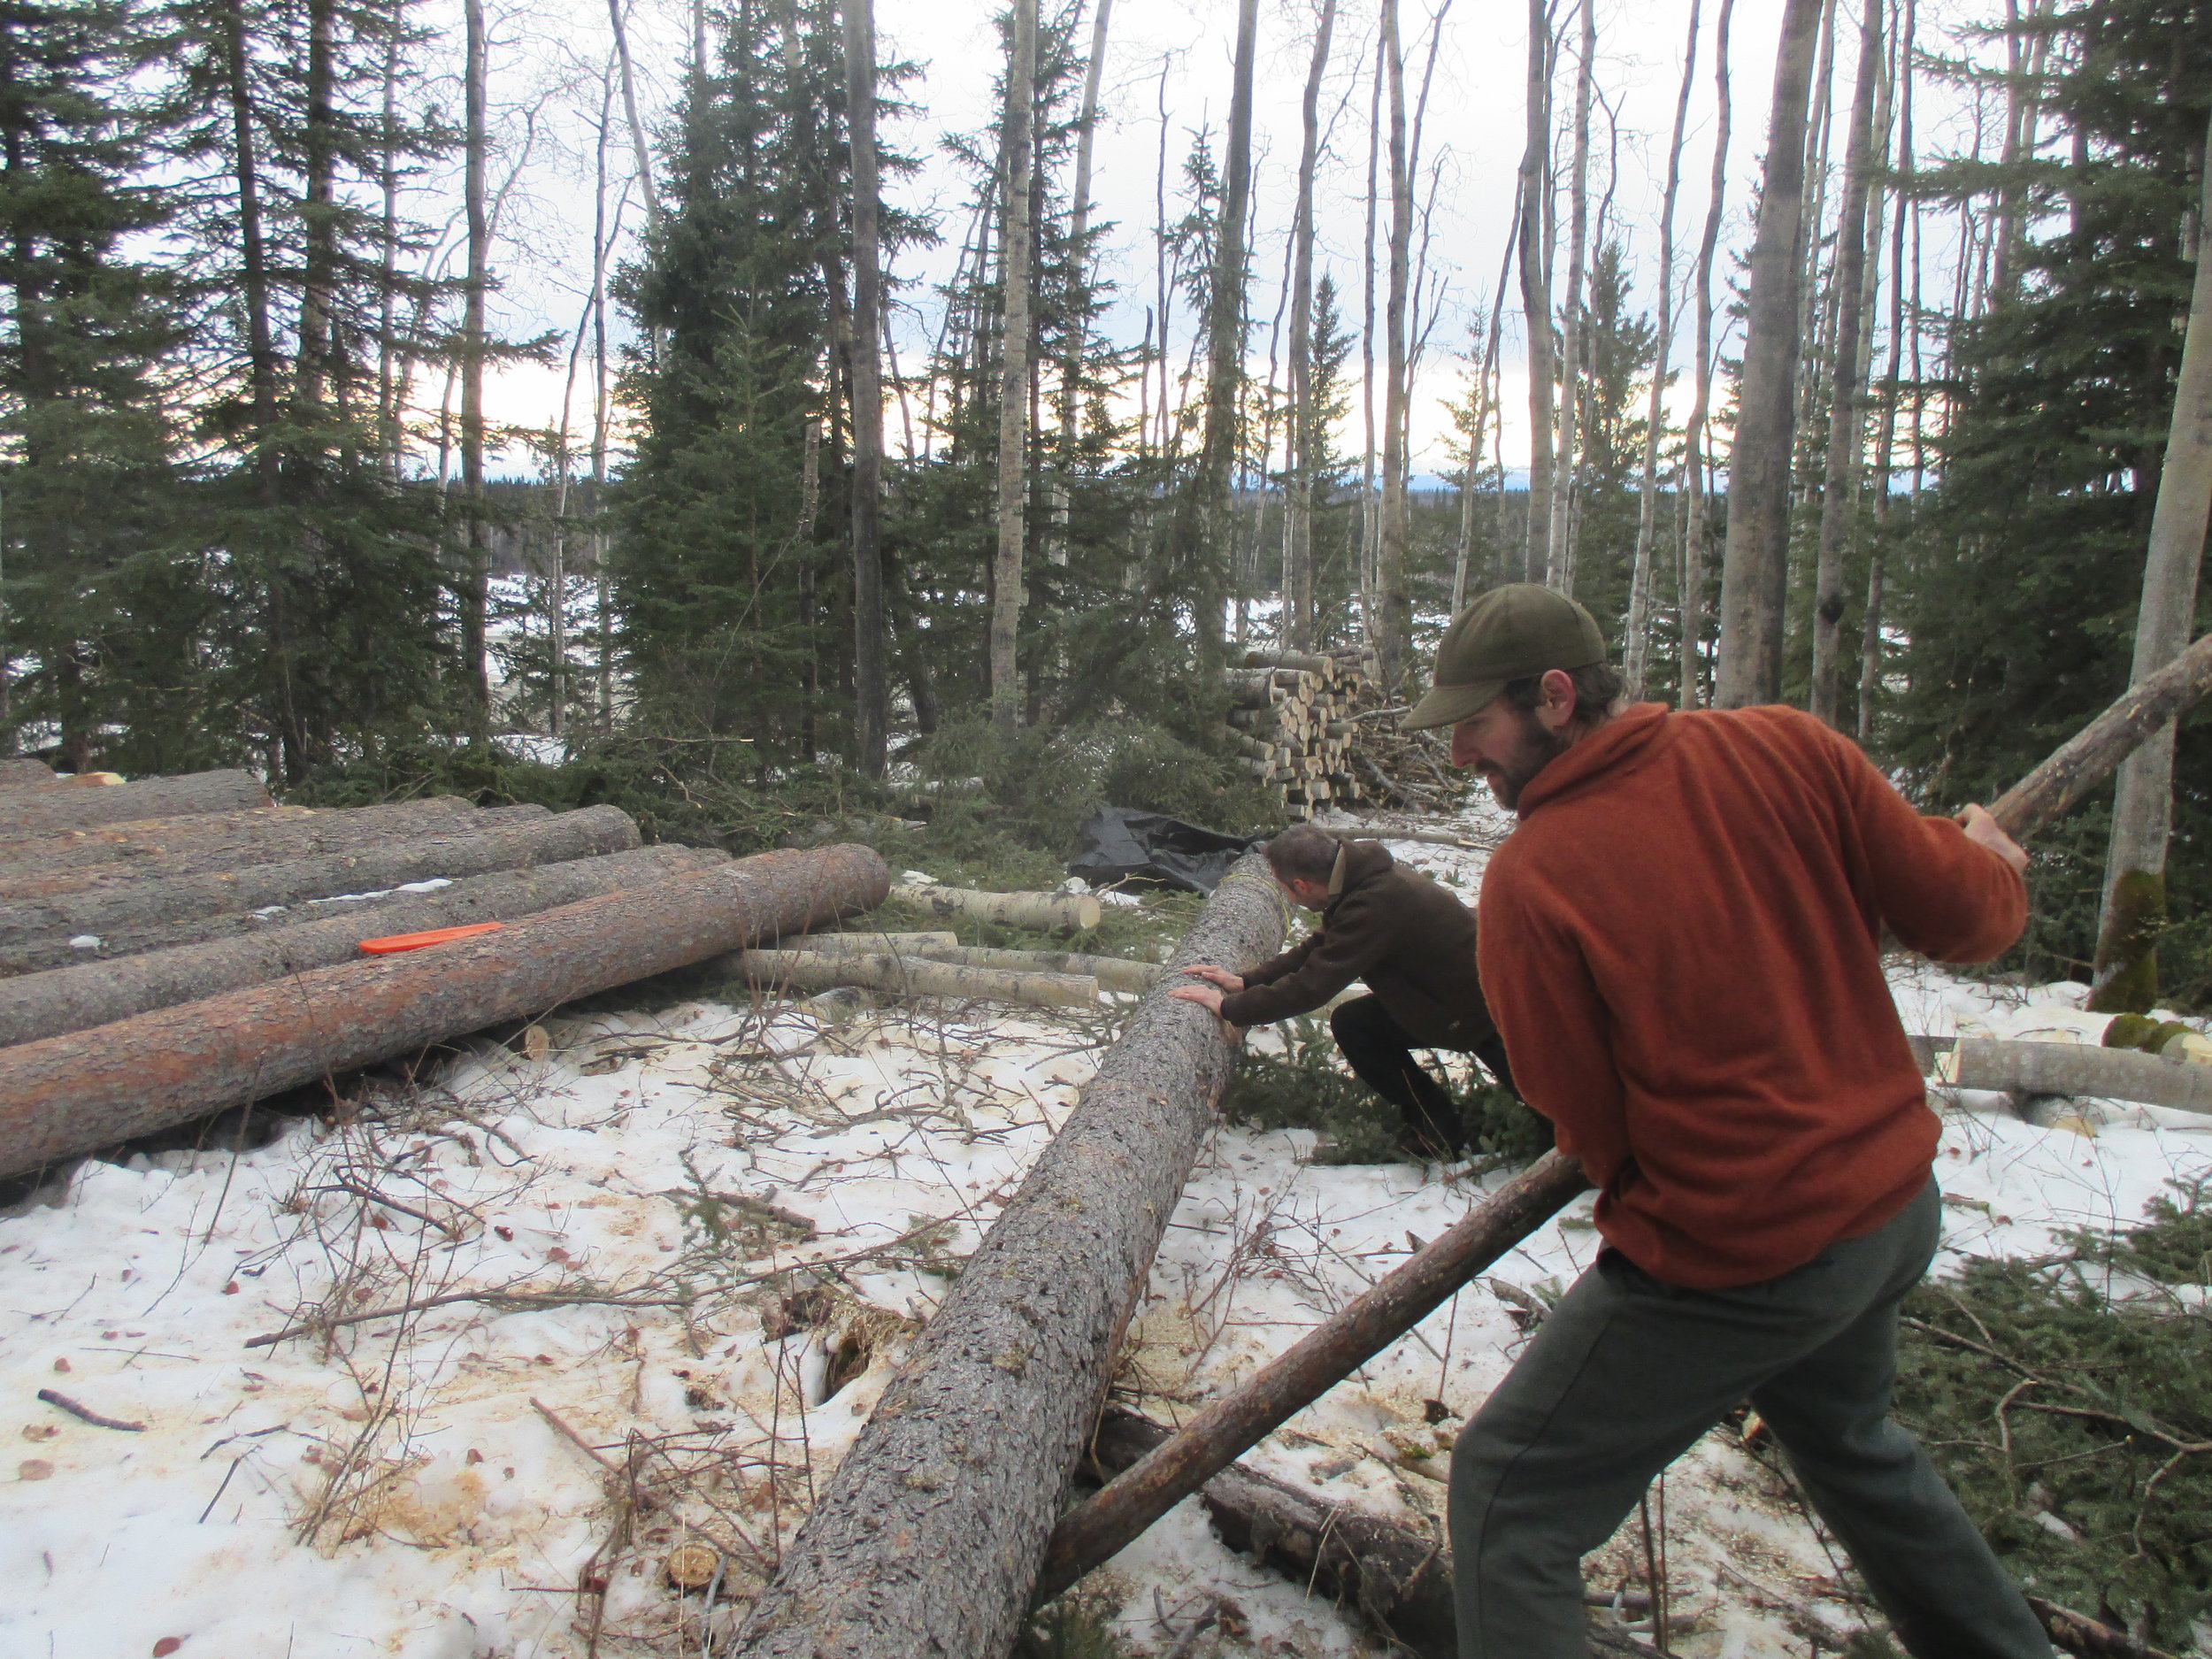
3. Pry bars/lever poles (image below on the left)- For this we just used dry spruce poles about 6-10 feet in length. We used these to roll, pry and scoot the logs around.
4. Portable Winch brand gas-powered capstan winch (image below on right)- This is an expensive toy, but honestly if I had to choose between it and a clothes washer (my number one pick for household accessories) I would choose the winch. Having it was like having super powers. I was able to operate it alone and move logs all around the log yard. We also use the winch to haul a cart full of heavy things like gravel for the foundation up our 100+ foot bluff. So for the big moves, this was a really brilliant tool. Here is a link to the one we have: https://www.portablewinch.com/us_en/winches/gas-winches/pcw5000/

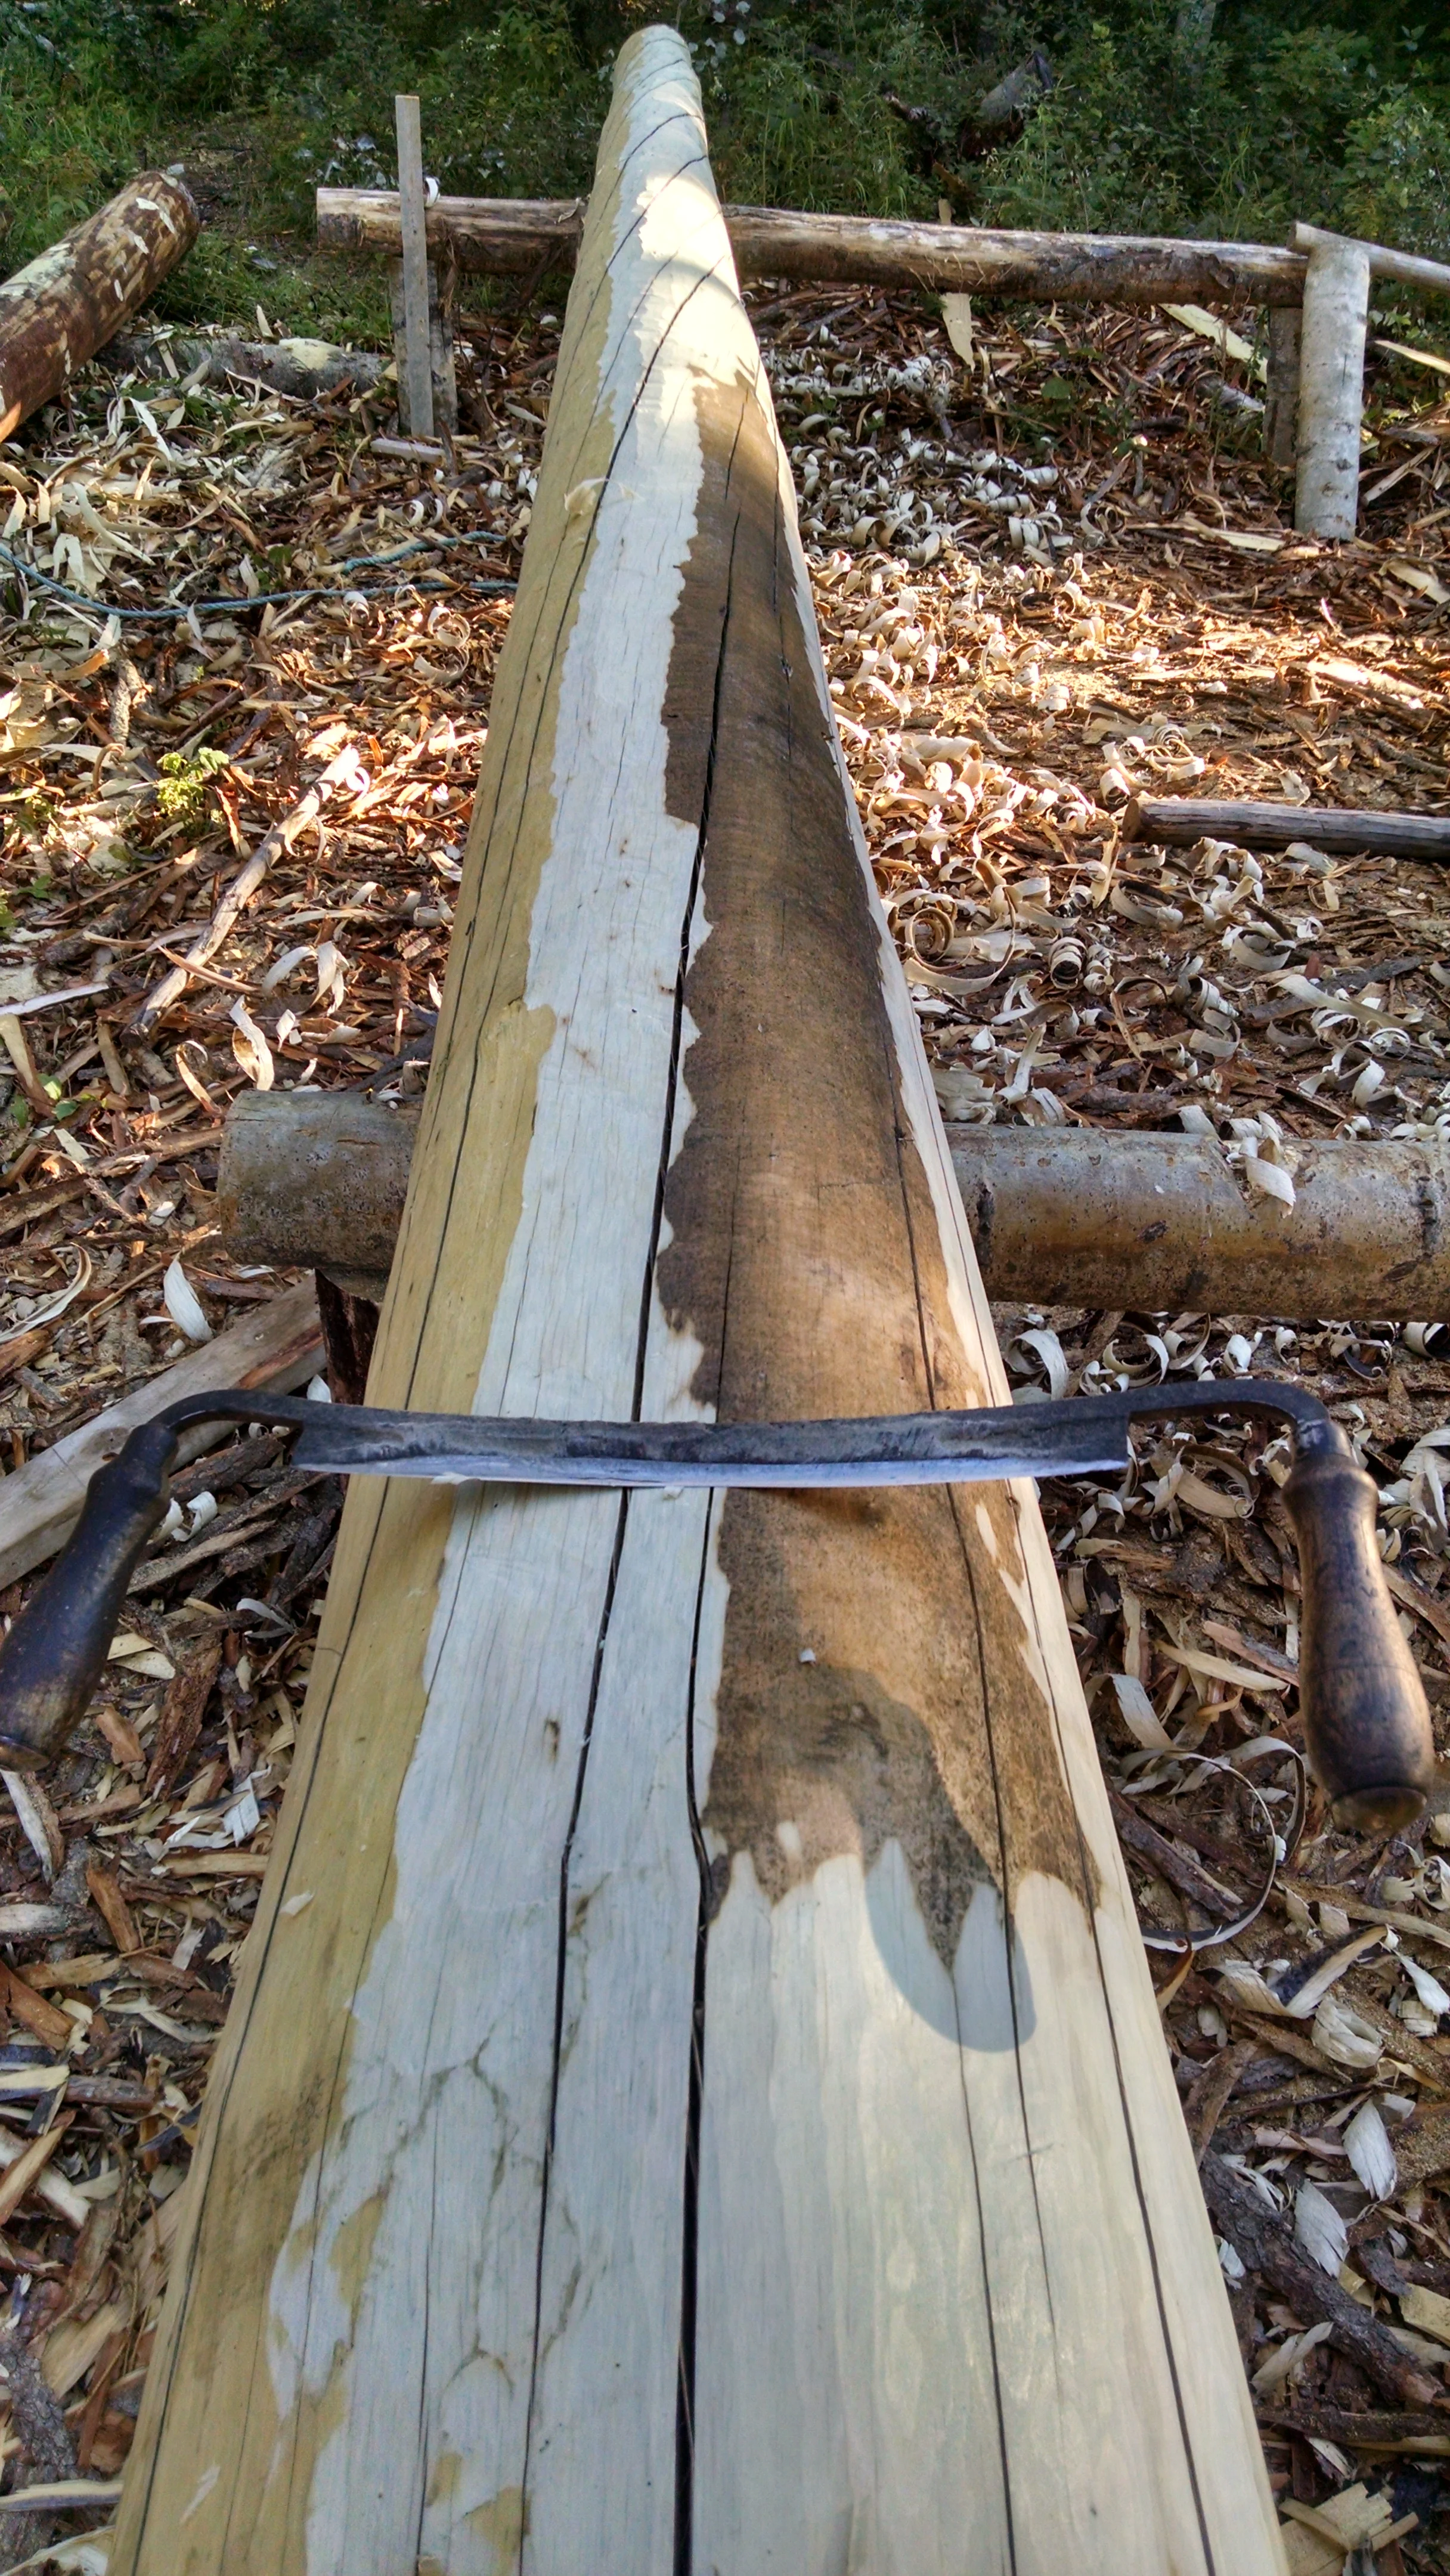
Enough with tools and back to peeling! When it came time to put the logs on the wall, we wanted them to be smooth and light in color. The 1-2 summers that they spent drying turned them colors and we want the interior of this cabin to be as light in color as possible. Thus, the peeling began. In the log below you can see the different colors that the log turned from sun (left), sun and rain (right) and a nice peel job (center). While we made sure to store all of our drying logs off the ground on a small rack, we didn’t do as good of a job as we could have at rotating the logs so that they dried evenly. As as result, the section of the log that faced up to the sky for the longest was a different color and moisture level than the side that was faced down. Also, we got some rot on the logs where they made contact with the rack. Most of this was remedied through the peeling process. We used relatively small draw knives to peel. We had as many as 5 of them on site, but tended to prefer the one in this picture. As you can tell, its gotten a lot of bark miles out of this process and was re-sharpened at least every other day during heavy peeling season.
To prepare the logs for peeling with drawknives, we needed to smooth them out and carve down the rough patches and bumps where the branches grew. For this step we used either an axe (left) or power planer (right).


Early on, our friend Maureen came out to help and she helped build this log rack. It made it so we could stand upright and peel the logs, which is much more efficient and nicer on your body. In this picture there are roof poles on the log rack and shavings below. We had to rake out the shavings to keep our rack high enough! The only problem with a log rack is that you have to get the logs up onto it. We made ramps on one side and used pry bars and the gas winch to get the logs up. As usual, we found the best way to do this right at the end of the peeling!

Some of the logs, like the ridgepole, perlins, and sill logs below (32 ft long) were too much of a pain to get onto the log rack. These logs we peeled the “grunt” method by propping them up on other short logs or rollers and sitting on top of them. This method is what is going on in the photo below.

The final step of our peeling process was painting each log with some clear wood preservative to help keep it from rotting and discoloring during the building process. We got a reccomendation for this product from our friend Randy Brown who has used it with good results on his log cabin home. It doesnt keep the logs from graying (the color they turn naturally in the sun) but it does protect them from rotting without being too toxic. We wanted to avoid heavy-duty chemicals. One of the best things about building with local materials is that in 100 years when we’re gone the cabin can decompose and rot away into the landscape. The Tanana River is full of old cabin remnants with trees growing through them. We try to think of this “end” goal when we decide what materials to use and where reasonable, we are trying to avoid bringing in plastic and other non-biodegradable materials. Here is the stuff we went with for painting the logs. So far, so good.
